Azure App Service, deployment slots (with configuration !) and Terraform
When you want to implement blue-green deployment using Azure App Services, deployment slots is the way to go. You can create a staging slot to deploy the new version of your code, test it and swap with the production slot once ready to make the new version go live. All of this without causing downtime.

Another main feature of App Service is configuration with app settings, who are environment variables set at the service level and injected to the application code.
I have been using all of these for several projects over the years, but once we have started using IaC (especially Terraform), things became complicated as swap operations were messing up with the Terraform state.
After almost stopping using slots over the last few years, I have finally found an approach to make them work using Terraform and I’m happy to share it in this post.
By writing this post I assume you already have a good understanding of Terraform and App Service, at least you have tried to use them together 😉
If this sounds new to you I recommend reading my first post about Terraform, as well as some content on App Service (see the overview, app settings and deployment slots pages from the official documentation).
The problem with deployment slots and Terraform state
The main issue with deployment slots and Terraform is that the swap operations are usually performed outside of Terraform. After a swap not only the deployed package changes from one slot to another, the swap impacts also all the configuration (including app settings), application stack, Docker image if you are using containers, etc.
All of these properties are included in the Terraform state, so the the next apply after a swap will try to revert the changes, probably causing a mess.
You might disagree on the “usually performed outside of Terraform” part of this paragraph. I know there is a resource in the AzureRm provider to perform swaps, I have tried and abandoned it and explain why later in this post.
TL;DR: The solution, “briefly” explained
If you are here only for the solution and don’t want to check the demo and read the whole thing (which is fine), I’ll try to explain my approach as briefly as I can in this section.
The solution relies on the following principles:
- An
active_appinput variable to the main module whose value can be eitherblueorgreen. The main module also receives two app settings variables: one for the blue version of the app, one for the green one.
These 3 variables are used together by the module creating the App Services resources in the following way: the settings of the active app go to the production slot, the other to the staging slot. - The
active_appvariable is also set as an output of the main module. This might sound silly but it’s the way I’ve found to store the following information in the state: What was the active app during the lastterraform apply, the blue one or the green one ? And this is a key part of the solution. - The swap operations are made using the Azure CLI with the
az webapp deployment slot swapcommand.
Right after a swap, the previousactive_appvalue is retrieved from the state using theterraform output active_appcommand. Then aterraform applyis made using the new value of theactive_appvariable (which is the opposite of the previous one).
This apply does not changes anything to the infrastructure, it changes the value of theactive_appoutput, thus saving in the state which version of the app is live. - Before applying any change to the infrastructure that is not related to a swap, the latest value of the
active_appis retrieved from the state (still using theoutputcommand). The same value is passed as theactive_appvariable so that the properties of the slots are not swapped by theapplycommand.
This is it, it was not really brief but those 4 points need a minimum amount of details. Still confused ? I got you covered, the rest of this post shows a demo with more in-depth details.
GitHub repository
As I almost always do I have prepared a GitHub repository with a demo consisting of a simple ASP.NET web app, Terraform code and GitHub Actions for deployment.
You can fork this repo and run the demo by yourself by following the instructions in the README file. Or you can stay here, I will explain how things work in the next section.
The demo, in action
The demo consists in a simple ASP.NET application (running in an App Service of course) presenting a page that can be either blue or green.
The structure of the repository is very classic:
- The
srcfolder contains the application code - The
infrafolder contains the Terraform files - The
.github/workflowsfolder contains the GitHub Actions workflows
I took this demo as an opportunity to level-up my GitHub Actions skills but I won’t focus on it, as everything can be done locally or from any CI/CD solution.
Provision resources, and deploy code in both slots
Let’s start when the blue version of the application is already running in production, and the green one being tested in the staging slot. To fast-forward to this situation, I run the initial-deployment workflow of the demo to perform the following actions:
- Using Terraform, create a resource group, an App Service Plan, an App Service and a staging slot.
- Checkout the
bluetag of the repo, build the code and deploy the package to the production slot of the App Service - Checkout the
greentag of the repo, and also build the code but deploy to the staging slot
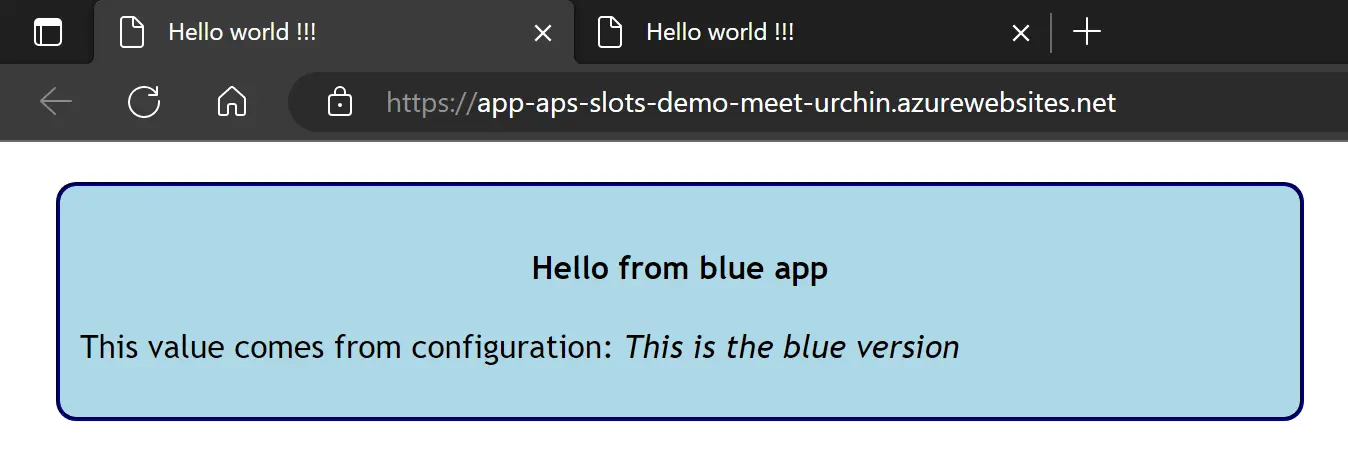
So far this is what we have in production:
 I have also strengthen my front-end chops for this project
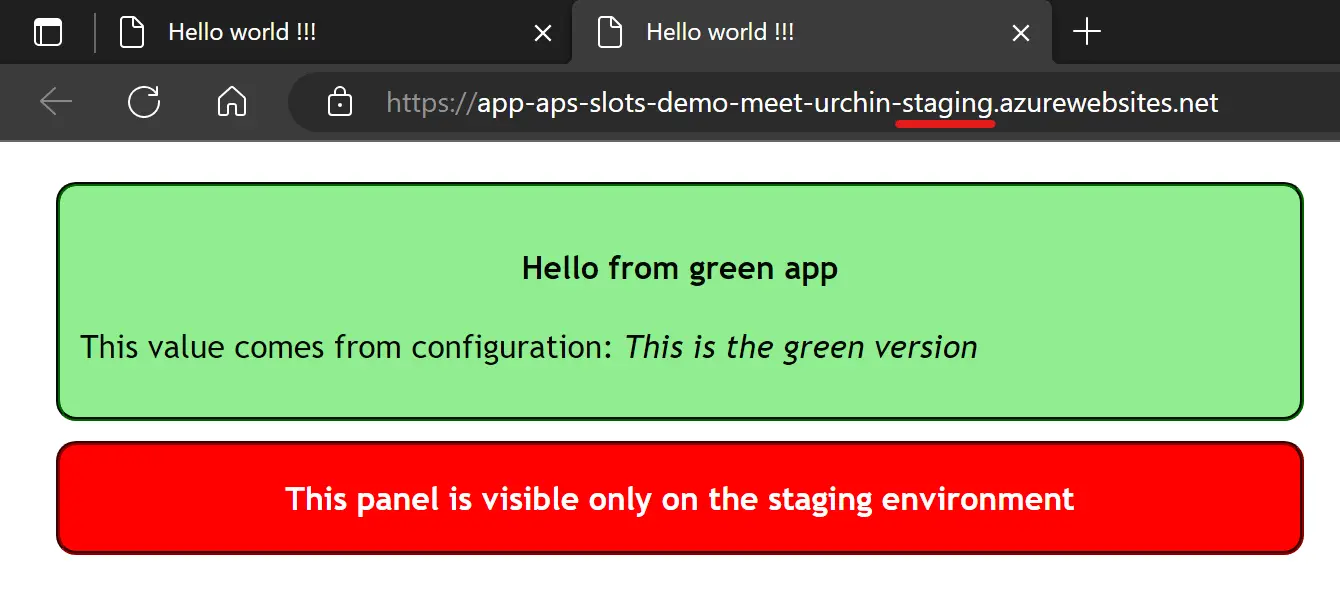
And in staging:  You see that red panel over here ? Its presence is managed using deployment slots (or sticky) settings
A little glimpse inside the IaC
As you can see in the pics both versions of the app shows a value in italic that comes from configuration, and a red panel only on the staging slot. This done using the active_app variable declared like this in the main module:
1
2
3
4
5
6
7
8

variable "active_app" {
  type    = string
  default = "blue"
  validation {
    condition     = var.active_app == "blue" || var.active_app == "green" || var.active_app == ""
    error_message = "The active_app value must be either 'blue' or 'green' (defaults to 'blue')."
  }
}
In the call to the app_service module, this variable is passed alongside the settings for the blue and the green app:
1
2
3
4
5
6
7
8
9
10
11
12

module "app_service" {
  # ...
  active_app = var.active_app

  blue_app_settings = {
    "EnvironmentLabel" = "This is the blue version"
  }

  green_app_settings = {
    EnvironmentLabel = "This is the green version"
  }
}
In the app_service module, the active_app variable is used which settings should be used for the production slot (which is the App Service resource itself):
1
2
3
4
5
6
7
8
9
10

resource "azurerm_linux_web_app" "app" {
  name                = "app-${var.project}-${var.app_name}"
  # ...
  app_settings = var.active_app == "blue" ? var.blue_app_settings : var.green_app_settings

  sticky_settings {
    app_setting_names = ["IsStaging"]
  }
  # ...
}
Notice the sticky_settings block ? It is used to display the red panel only on the staging slot, whose creation also relies on the active_app variable but in a slightly different way:
1
2
3
4
5
6
7
8
9
10
11
12
13

locals {
  # Store the "non-active" app settings in a local
  slot_app_settings = var.active_app == "blue" ? var.green_app_settings : var.blue_app_settings
}

resource "azurerm_linux_web_app_slot" "staging" {
  name           = "staging"
  app_service_id = azurerm_linux_web_app.app.id

  # Combine the "non-active" app settings with the sticky one
  app_settings = merge(local.slot_app_settings, { IsStaging = true })
  # ...
}
Let’s swap !
Swapping is done using the azcli-swap workflow who first runs the following command:
1

az webapp deployment slot swap -g $RESOURCE_GROUP_NAME -n $APP_SERVICE_NAME -s staging
And just after that it saves the newly active app in the Terraform state using this script:
1
2
3
4
5
6
7

terraform init
# Get the previous active app from the state...
currentActiveApp=$(terraform output -raw active_app)
# ...and "reverse" it: green turns blue, blue turns green...
[[ "$currentActiveApp" == 'green' ]] && newActiveApp="blue" || newActiveApp="green"
# ...finally save the new active app in the state
terraform apply -auto-approve -var active_app=$newActiveApp
Which produces the following output:
1
2
3
4
5
6
7

Changes to Outputs:
  ~ active_app = "blue" -> "green"

You can apply this plan to save these new output values to the Terraform
state, without changing any real infrastructure.

Apply complete! Resources: 0 added, 0 changed, 0 destroyed.
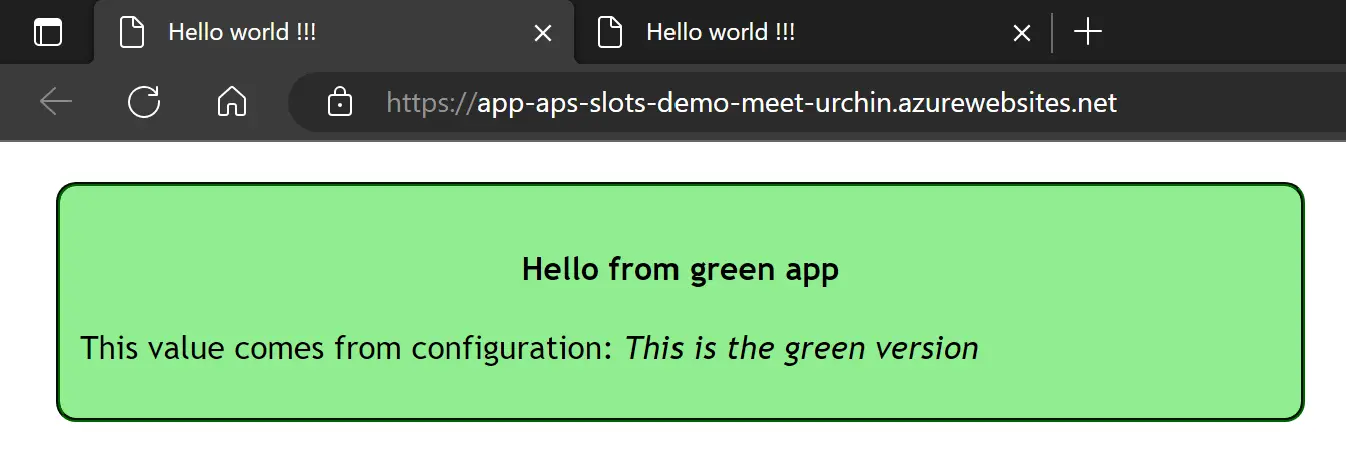
Back to the browser, the green version is now in production: 
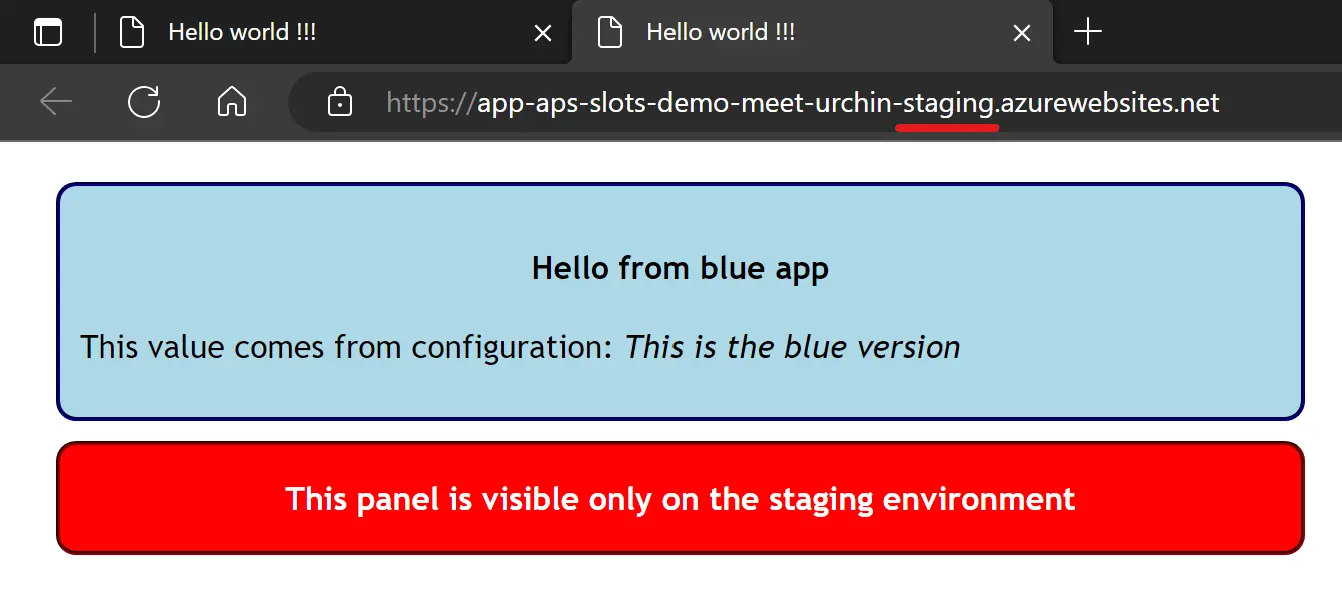
And the blue one has moved to staging: 
In case of a rollback…
To perform a rollback, just run the azcli-swap workflow again ! Executing the same steps will put the blue version back in production, and green one in staging, just like before the first swap.
In the real world, this is why it’s handy to keep the previous version in the staging slot: even if the new bits have been tested in staging, problems can still occur once in production so better be ready to put things back in place !
What about other changes to the infrastructure ?
To apply changes not related to a swap, it’s almost as simple as your average terraform apply. You just need to retrieved the current value of the active_app output and pass it as a variable:
1
2

activeApp=$(terraform output -raw active_app)
terraform apply -auto-approve -var active_app=$activeApp
In the workflow code, the output is done like this:
activeApp=$(terraform show -json | jq -r '.values.outputs.active_app.value // "blue"')
This is to handle the first apply, as theoutput -rawcommand returns an error if the state is empty. I have filled an issue for this, any 👍 is appreciated 🤗
A few words about the azurerm_web_app_active_slot resource
Before closing this post, I want to talk a little about another solution I had tried initially but later abandoned.
The AzureRm Terraform provider provides the azurerm_web_app_active_slot resource to perform a swap using Terraform.
There is even a page on Microsoft Learn that explains how to use it and has inspired me to write this post.
Initially I had built my demo using this resource like this:
1
2
3
4
5

resource "azurerm_web_app_active_slot" "active_slot" {
  count = var.active_app == "green" ? 1 : 0

  slot_id = azurerm_linux_web_app_slot.staging.id
}
And it worked: applying the configuration with the active_app set as green did perform a swap.
Things got weird when I tried to rollback: applying again with active_app as blue removed the active_slot resource from the state, but it did not make a swap in the other way. Actually I had to apply the configuration again with active_app as green to make the blue app active again 😖
And it went crazier when I put app settings in the mix: I always ended up with the blue app settings attached to the green app, and vice-versa…
Finally I think that this resource performs an API call to make the swap, aka a one-shot operation that will make changes on the infrastructure described else-where in the code-base.
The result is a mix (a mess ?) of:
- an imperative approach, aka this
active_slotresource who tells “do this swap operation !” - a declarative approach , aka the rest of my Terraform code-base, who tells “hey I need this stuff but I let you do your thing to make it happen”
And I prefer not to mix both approaches, that’s why I ended up separating them and notifying the declarative stuff (the Terraform state) of the changes made by the imperative stuff (the swap with az cli). Damned I really hope this last sentence makes sense 😅
Wrapping up
Getting to the end of this post has been quite a ride, the writing went pretty smooth but once again I have probably spent way too much time on this demo. But I’m happy with the result, I hope this provide one approach that everyone can use as a starting point to combine the benefits of deployment slots with Terraform.
I have learned a ton doing this, as I had barely touched GitHub Actions before. There was also a few gotchas in Bash scripting, and I can’t remember the last time I built even the simplest webpage without a frontend framework…
Thanks for reading, feel free to reach out to me if you need, and happy coding 🤓