App Services with Bicep & GitHub Actions, part 2: Deployments slots
This is the second and last post of the series about deploying Azure App Services with Bicep. In the first episode, we have created an App Service with Bicep, and deployed some code to it, all with the help of GitHub Actions.
This time we will add blue-green deployment on top of that, using App Service deployment slots. Why shall we do that ? Because it will make our upcoming deployment smoother, without any downtime.
What is blue-green deployment anyway ?
Blue-green deployment has several definitions, we will stick here to the one from Wikipedia:
In software engineering, blue-green (also blue/green) deployment is a method of installing changes to a web, app, or database server by swapping alternating production and staging servers.
Let’s say we want to manage two version of our application: a blue one and a green one. The lifecycle of our app will follow these steps:
- We start with the blue version in production and the green version in staging
- green is the future version so we work by making changes on it
- Once the green version ready we swap so it goes live and blue moves to staging
- We begin a new cycle of development, but this time working on the blue version as it becomes the next version
- Once ready another swap is made, blue goes live, green moves to staging, we are back in step 1 and we start over
Other sources define blue-green as a gradual deployment but that’s not what we will be using here.
The problem with deployment slots and IaC
Deployment slots is a feature of Azure App Services, you can learn more about it here if you’re not already familiar with it.
Using deployment slots and IaC is simple until you introduce differences between your slots at the infrastructure level. Unfortunately this happens very quick if some of your app settings or your application stack is managed in your IaC code.
The problem is that the swap operation uses an imperative approach which conflicts with the declarative approach of your IaC code. As the swap is done using the portal or the CLI, the Bicep code isn’t aware of the change, so the next deployment will revert the changes and mess everything up.
The key points of my solution
Luckily we can solve this by following these rules:
- The answer to the question “which version is currently deployed in the production slot ?” must be stored somewhere and easily accessible
- Every time we perform a Bicep deployment, we pass the configuration of both versions
- We also pass to each Bicep deployment which version of the app is in production
The key point is where do we store the answer of rule n°1. In Terraform we can use the state but there is no such thing with Bicep.
The trick is to use a deployment parameter activeApp whose value can be either blue or green. Then we can use the CLI to retrieve the parameter value of the latest deployment. This will be demoed in a moment.
GitHub repository !
As always all code described here can be found on my GitHub, with all the instructions in a README to run the demo by yourself.
The demo consists in an ASP.NET web app, Bicep code and GitHub Actions workflows. In this post I will focus on the changes made from the samples of the first post of the series. To see the full picture you can browse or clone the repository.
Some screenshots of the demo
Let’s see what we are going to build, starting at the first step of our deployment cycle. In the previous post we already had the blue version of the app in production: 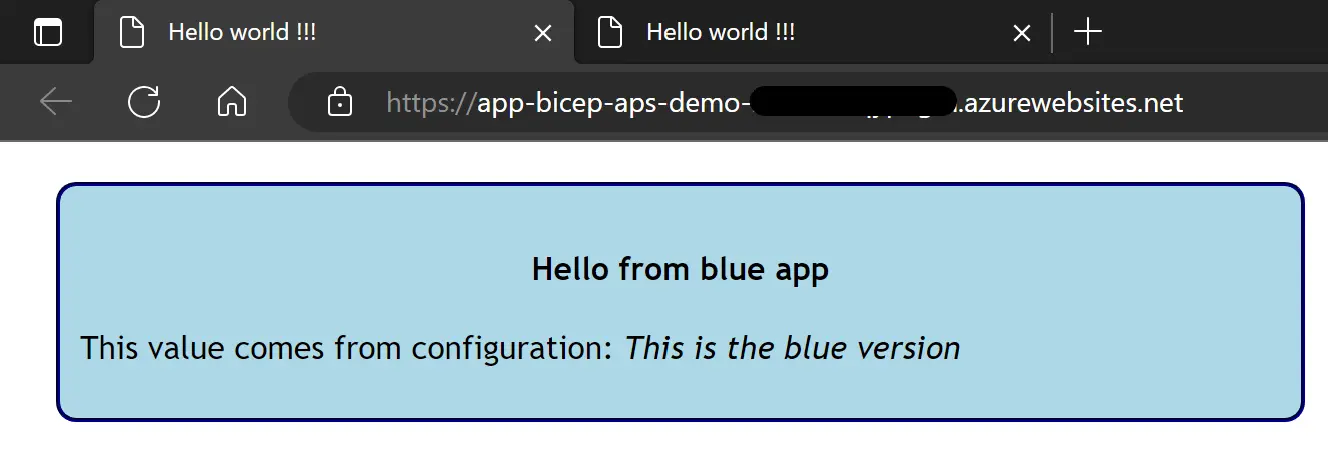
This time we are going to add the green version in the staging slot: 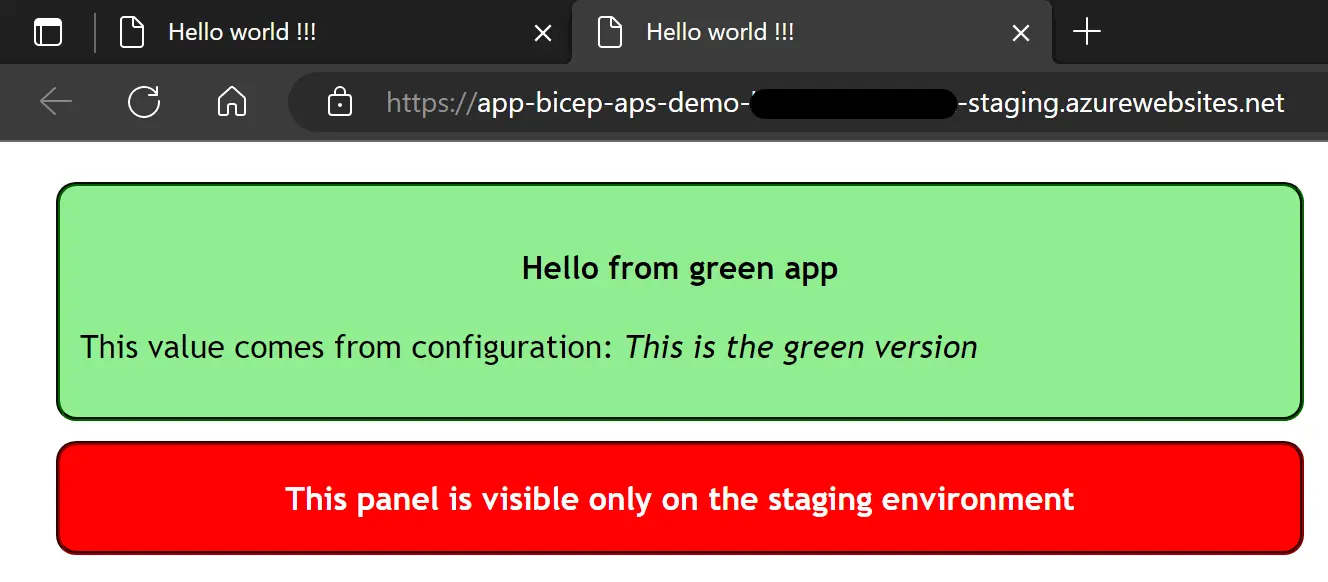 Notice the URL with the -staging suffix in the subdomain
Updates on the Bicep code
Let’s see what we need to change in the Bicep code to make this happen.
Add a deployment slot
Adding a deployment slot is simple, we give it a name and set the App Service resource as the parent:
1
2
3
4
5
6
7
8
9
10
11

resource staging 'Microsoft.Web/sites/slots@2022-03-01' = {
  name: 'staging'
  location: location
  parent: app // This is a symbolic reference to the App Service resource

  properties: {
    siteConfig: {
      linuxFxVersion: linuxFxVersion
    }
  }
}
We also set the same location and application stack as the parent App Service.
Add the activeApp parameter
Here we are starting to follow the rules established earlier, starting with rule n°3: always pass which value is active in production. This is done with the activeApp parameter, declare in the main module and passed to the module in charge of the App Service creation:
1
2

@allowed([ 'blue', 'green' ])
param activeApp string = 'blue'
Manage the blue and the green configuration
After rule n°3 we have to follow rule n°2: pass the configuration of all versions at each deployment.
One of the key point of the demo is to have different values in the app settings of the production and the staging slot. When the appService module is called, we pass two arrays of app settings, for the blue app and for the green app:
1
2
3
4
5
6
7
8
9
10
11
12
13
14
15
16
17
18
19

module appService 'modules/appService.bicep' = {
  name: 'deploy-app-service'
  params: {
    activeApp: activeApp
    // ...
    blueAppSettings: [
      {
        name: 'EnvironmentLabel'
        value: 'This is the blue version'
      }
    ]
    greenAppSettings: [
      {
        name: 'EnvironmentLabel'
        value: 'This is the green version'
      }
    ]
  }
}
Note that we also pass the activeApp parameter as mentioned earlier.
In the appService module, this parameter is used to determine which configuration is bound to the production or the staging slot:
1
2
3
4
5
6
7
8
9
10
11
12
13
14
15
16
17
18
19
20

resource app 'Microsoft.Web/sites@2022-03-01' = {
  // ...
  properties: {
    // ...
    siteConfig: {
      // ...
      appSettings: activeApp == 'blue' ? blueAppSettings : greenAppSettings
    }
  }
}

resource staging 'Microsoft.Web/sites/slots@2022-03-01' = {
  // ...
  properties: {
    siteConfig: {
      // ...
      appSettings: activeApp == 'blue' ? greenAppSettings : blueAppSettings
    }
  }
}
Add a sticky setting
Notice the red panel only visible in the staging slot ? It’s managed using a slot or sticky setting, i.e. a setting that stays in a deployment slot and is never swapped.
To do this in Bicep we need to create a Microsoft.Web/sites/config resource to set the names of the sticky settings. Then any setting with one of these names will be created as sticky, whether it’s added to a slot or to an App Service.
In our example we need a sticky setting in the staging slot with the name IsStaging and the value true:
1
2
3
4
5
6
7
8
9
10
11
12
13
14
15
16
17
18
19
20
21
22
23
24
25

resource stickySettings 'Microsoft.Web/sites/config@2022-03-01' = {
  name: 'slotConfigNames'
  parent: app

  properties: {
    appSettingNames: [ 'IsStaging' ]
  }
}

var slotAppSettings = activeApp == 'blue' ? greenAppSettings : blueAppSettings
resource staging 'Microsoft.Web/sites/slots@2022-03-01' = {
  name: 'staging'
  location: location
  parent: app

  properties: {
    siteConfig: {
      linuxFxVersion: linuxFxVersion
      appSettings: concat(slotAppSettings, [ {
            name: 'IsStaging'
            value: true
          } ])
    }
  }
}
Note that the name of the
Microsoft.Web/sites/configresource has to beslotConfigNames, otherwise you’ll get an error.
Time for deployment and swapping !
First deployment
Now that the Bicep code is ready, to get at the first step of the deployment cycle for real, we run the initial-deployment GitHub Actions workflow. This workflow provisions all the resources in Azure, deploys the blue version of the app in the production slot, and the green version in the staging slot.
Basically we now have what is shown on the screenshots earlier. We can also see that the current value of the activeApp parameter is visible in the portal: 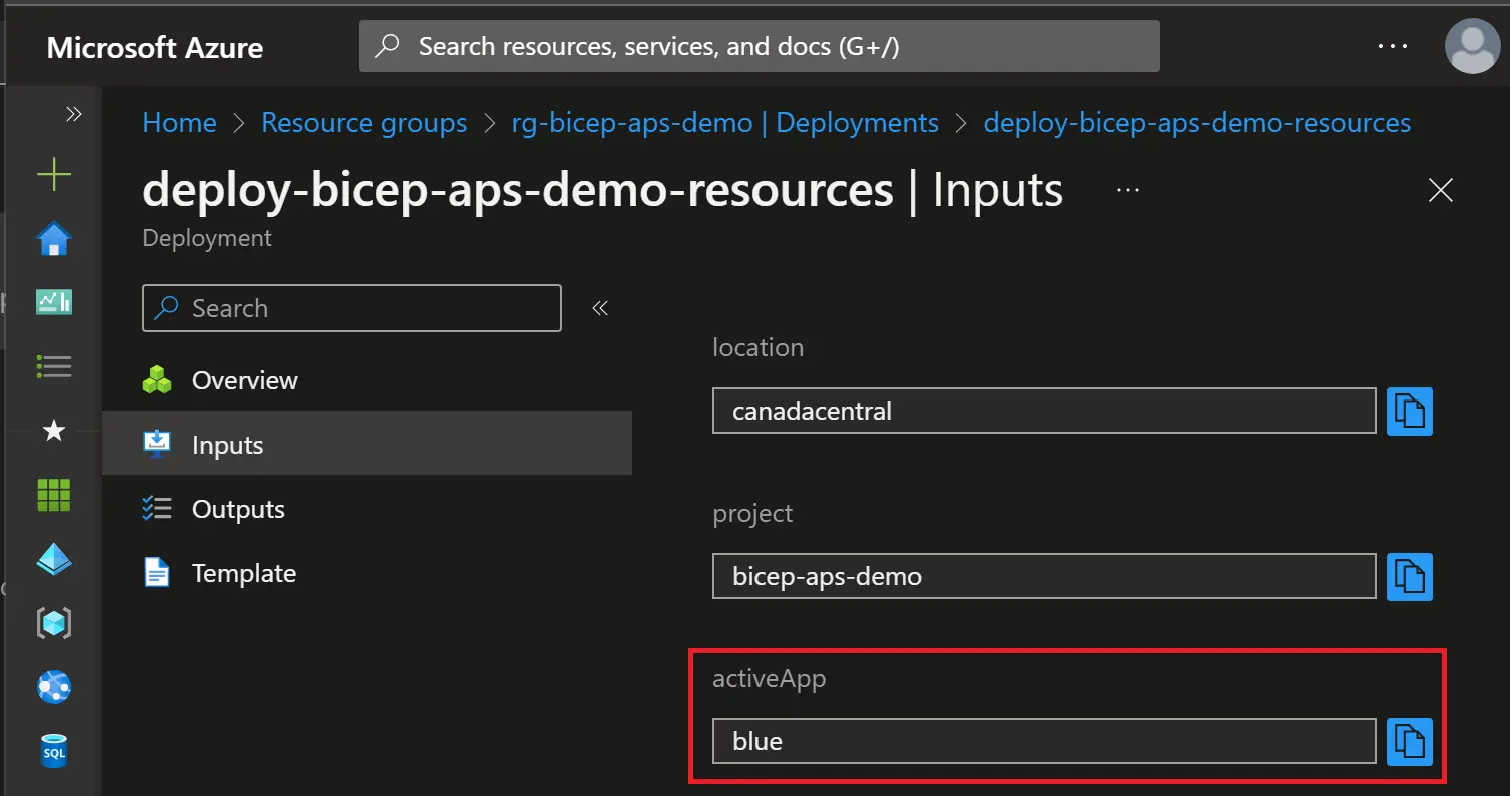 This helps us to implement the rule n°1: save which version is live somewhere
Swapping version
Moving forward to the third step of our deployment cycle, we make a first swap by running the azcli-swap workflow which uses the following command:
1

az webapp deployment slot swap -g $RG_NAME -n $APP_NAME -s staging
As expected the swap command puts the green version in production: 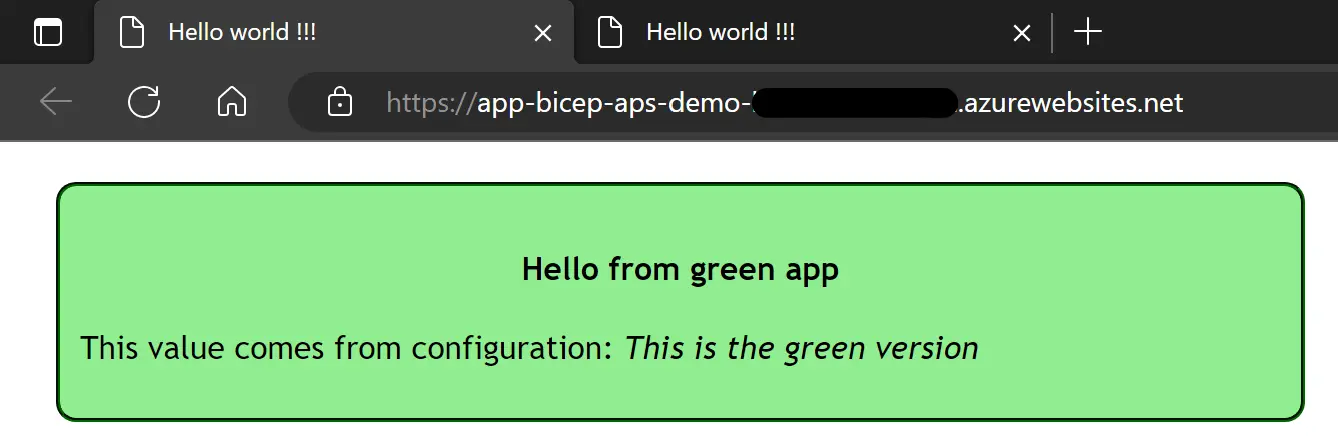 And the blue one is now in staging:
 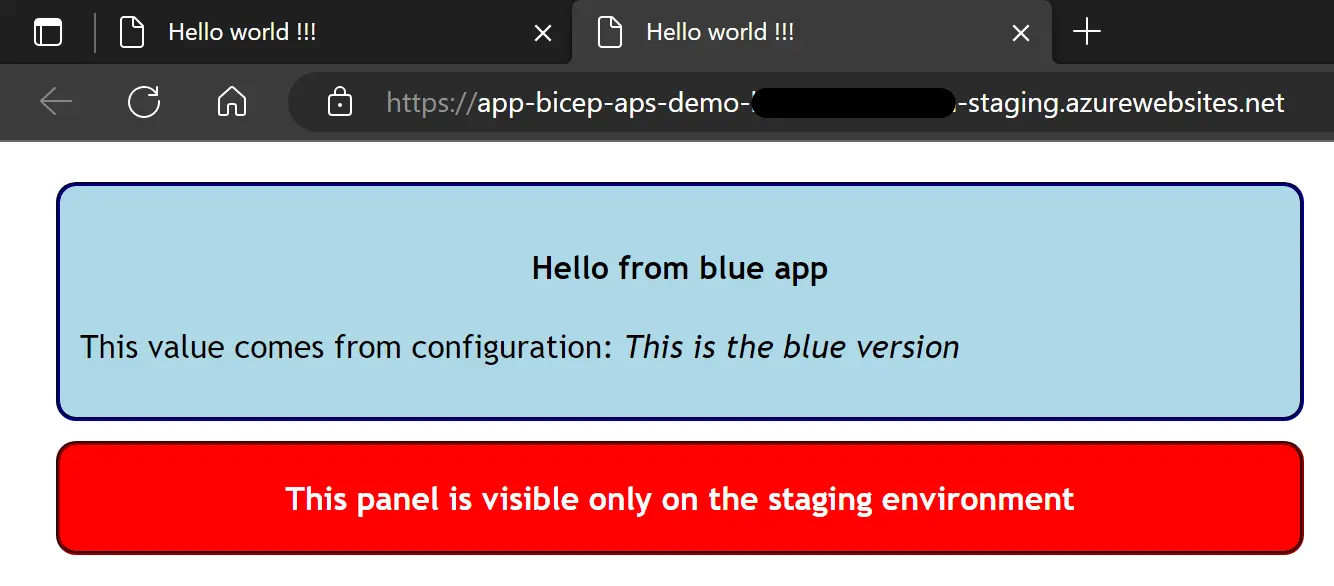 As expected the red panel stays in the staging slot Everything looks good but things would get messy if the workflow stopped here, as it still has to follow rule n°1: “always save which version is live somewhere”.
This is done in two steps, first the workflow gets the previous activeApp value and “inverts” it using Bash:
1
2
3
4
5
6

# Get the activeApp parameter of the latest deployment
previousVersion=$(az deployment group show -g $RG_NAME -n deploy-bicep-aps-demo-resources --query properties.parameters.activeApp.value -o tsv 2>/dev/null)
# "Inverts" the value: blue => green, green => blue
[[ "$previousVersion" == 'green' ]] && versionToUse="blue" || versionToUse="green"
# Outputs the inverted value for next job
echo "appVersion=$versionToUse" >> $GITHUB_OUTPUT
Then another deployment has to be made in order to save green as the new activeApp value:
1
2
3
4
5
6
7

update-active-app:
  uses: ./.github/workflows/bicep-deploy.yml
  needs: swap
  with:
    activeApp: ${{ needs.swap.outputs.appVersion }}
    updateSecrets: false
  secrets: inherit
Note that this deployment will have no change on the resources in Azure, it will only save the new version for the next deployments: 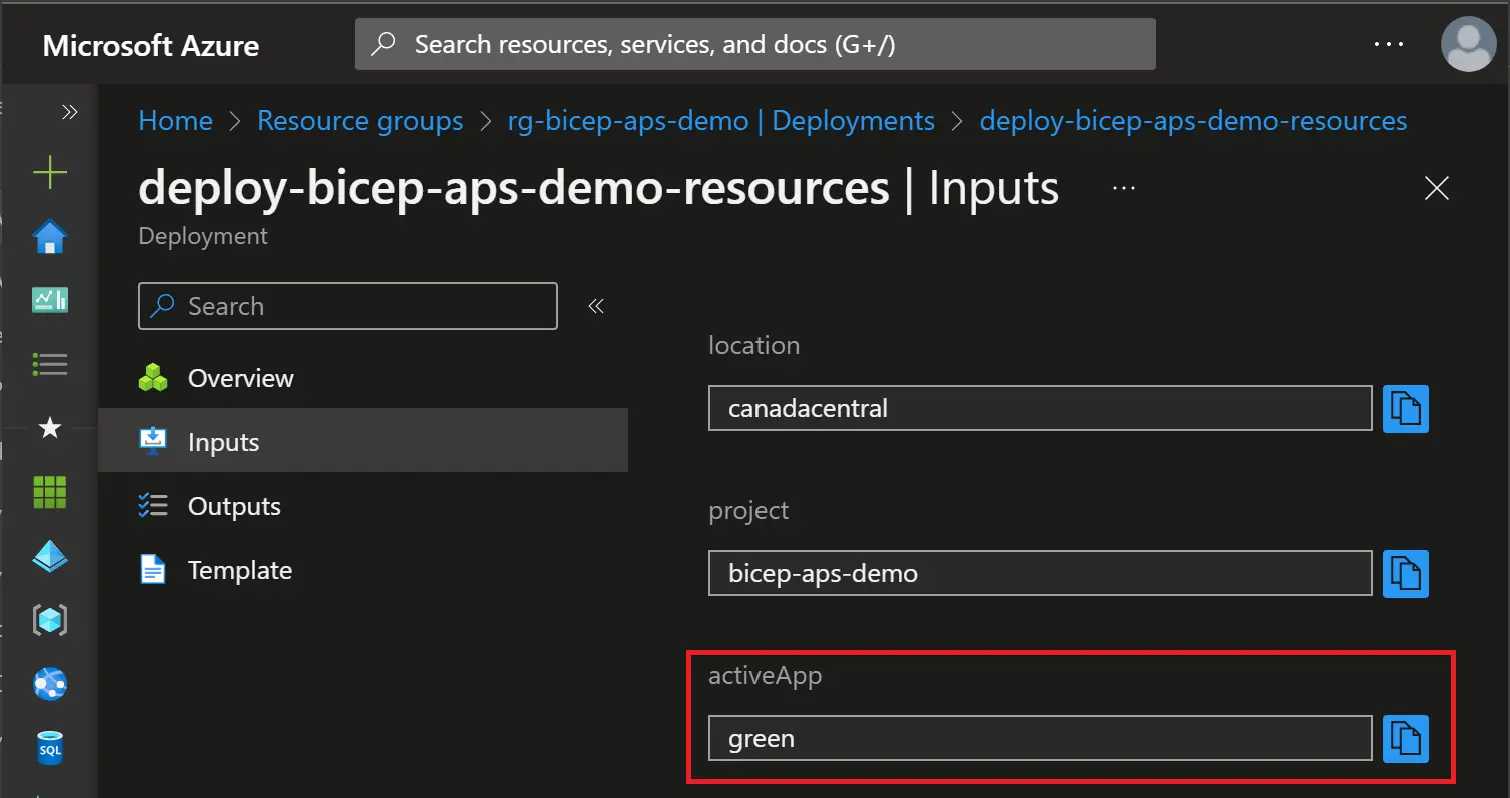
What about next deployments ?
Now that our first swap has been made, we are at the step 4 or the deployment cycle described earlier in this post.
What could happen next ? In case of a rollback, if we run the azcli-swap workflow again, the green app will be put back in staging, and the green one in production. That’s an handy benefit of using deployment slots: easy to rollback.
If any change has to be done on the infrastructure without swapping, we just have to get the activeApp value of the latest Bicep deployment, and use the same value.
Wrapping-up
This marks the end of this post and this series. I hope this gives you a baseline on how to manage your App Services with Bicep and GitHub Actions.
A always feel free to reach out if you have any question, you can even drop a comment below (this is new). Thanks for reading and happy learning 🤓