TLS with Terraform and Azure: generate self-signed certificates
We all love starting pet projects, so we tend to buy custom domains as it can be fairly cheap. SSL/TLS certificates on the other hand used to be pricey, but today there are several solutions to get these for free.
And this is for the good cause as every website should be secured by certificates nowadays.
This post is the first of a series where I will share 3 ways to automate the generation of certificates with Terraform for your Azure projects.
This one introduces the common workflow around an Azure Web App, and shows the first level of certificate generation using self-signed certificates.
The second post is using Let’s Encrypt and the last one managed certificates.
Presentation of the context for the whole series
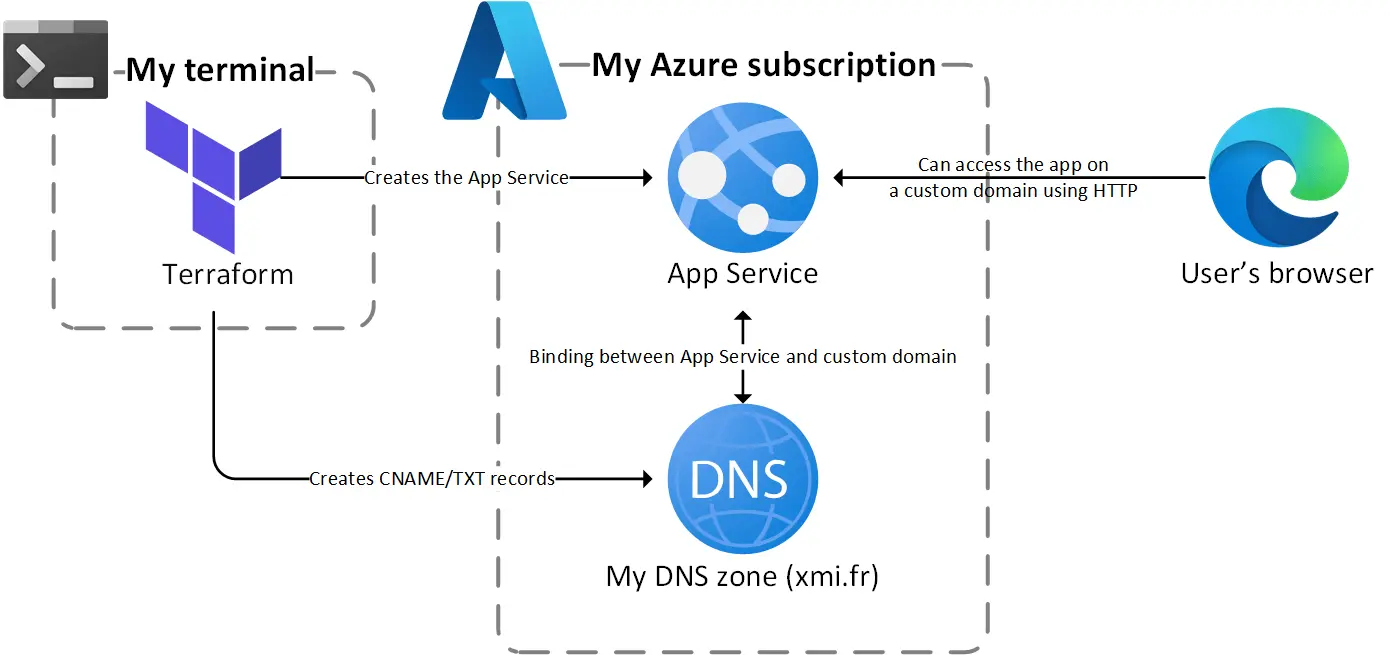
Let’s say we have the following architecture as a starting point:
 Let’s start with a Web App bound to a custom domain
So we have the following components:
- An App Service running in a plan with in the Basic tier at least
- A DNS zone with at least the following records:
- A CNAME record pointing to the default App Service hostname (
*.azurewebsites.net) - A TXT records to verify the domain ownership
- A CNAME record pointing to the default App Service hostname (
- These two records allow the creation of a custom hostname binding at the App Service level
Everything is created using Terraform CLI from my terminal, including the DNS records, that’s why I’m using Azure DNS 😎
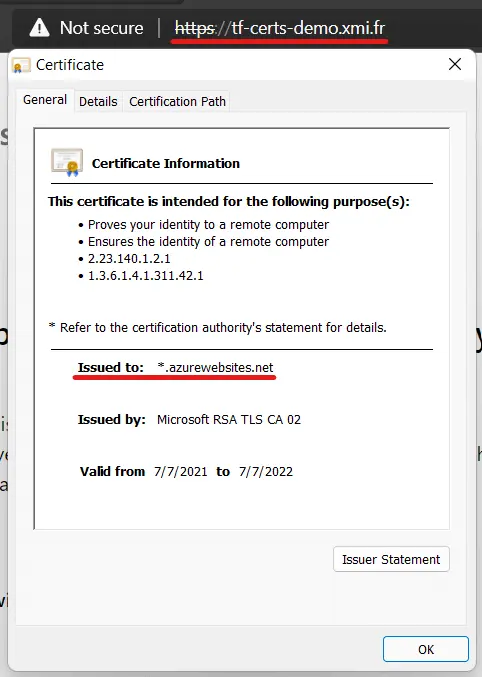
With this setup the App Service is accessible on the custom hostname using HTTP only, if we try to access it using HTTPS our browser displays an error as the only certificate it can find is bound the azurewebsites.net domain:
 The browser displays an error as the certificate doesn’t match the hostname… yet
In the Azure portal, the custom domain is added to the App Service but marked as unsecured:  The Custom domains blade of the Azure portal displays this error on our custom domain
Now that we have our basic setup, let’s see how we can secure this web app.
GitHub repository
All the code from this series of posts is available in the following repo.
The readme explains how to get started if you want to create the resources and generate the certificates in your own subscription.
Level 1: generating a self-signed certificate
As a very first step we will generate a self-signed certificate, something we will not do for production but can be handy for a quick test.
HashiCorp provides a tls provider to generate the certificate using Terraform just like we will do using openssl in Linux or PowerShell in Windows.
Here is the HCL code to do this:
1
2
3
4
5
6
7
8
9
10
11
12
13
14
15
16
17
18

# Creates a private key in PEM format
resource "tls_private_key" "private_key" {
  algorithm = "RSA"
}

# Generates a TLS self-signed certificate using the private key
resource "tls_self_signed_cert" "self_signed_cert" {
  private_key_pem = tls_private_key.private_key.private_key_pem

  validity_period_hours = 48

  subject {
    # The subject CN field here contains the hostname to secure
    common_name = var.common_name
  }

  allowed_uses = ["key_encipherment", "digital_signature", "server_auth"]
}
It’s just two resources: a private key and a certificate generated using this private key.
We could stop here but in an Microsoft context we need to export the certificate in PFX format to use it in an Azure service such as App Service or Application Gateway.
This is done by combining the use of the HashiCorp random provider (to generate a password) and the third-party provider pkcs12:
1
2
3
4
5
6
7
8
9
10
11
12
13
14
15
16
17
18
19
20
21
22

# To convert the PEM certificate in PFX we need a password
resource "random_password" "self_signed_cert" {
  length  = 24
  special = true
}

# This resource converts the PEM certicate in PFX
resource "pkcs12_from_pem" "self_signed_cert" {
  cert_pem        = tls_self_signed_cert.self_signed_cert.cert_pem
  private_key_pem = tls_private_key.private_key.private_key_pem
  password        = random_password.self_signed_cert.result
}

# Finally we push the PFX certificate in the Azure webspace
resource "azurerm_app_service_certificate" "self_signed_cert" {
  name                = "self-signed"
  resource_group_name = var.resource_group_name
  location            = var.location

  pfx_blob = pkcs12_from_pem.self_signed_cert.result
  password = pkcs12_from_pem.self_signed_cert.password
}
And that’s it, the certificate is ready to be used as an App Service certificate as you can see in the full code here.
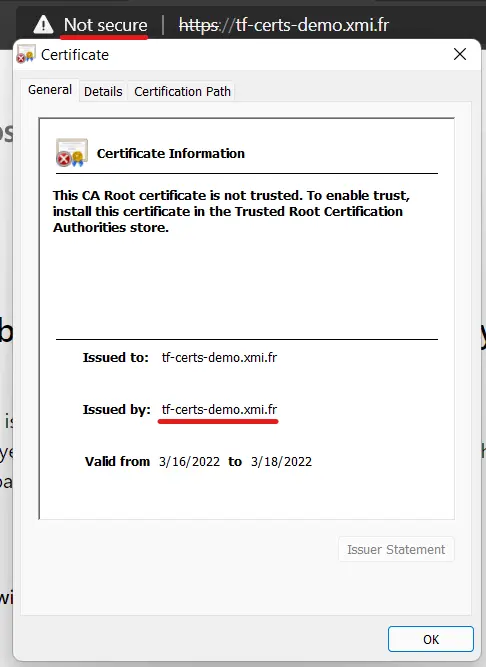
As you have probably guessed this certificate will not make the browser happy as our machine is not recognized as a trusted authority:
 The hostname matches but the browser still displays an error as the authority is not trusted
But at least the Azure portal is happier as it considers that the custom domain is now secured:  The Azure portal seems less picky than the browser…
Wrapping up
That’s it for this first step, which serves as an introduction to next posts. As I already mentioned the use of self-signed certificates is not recommended for production, and next you will see we can do much better than that.
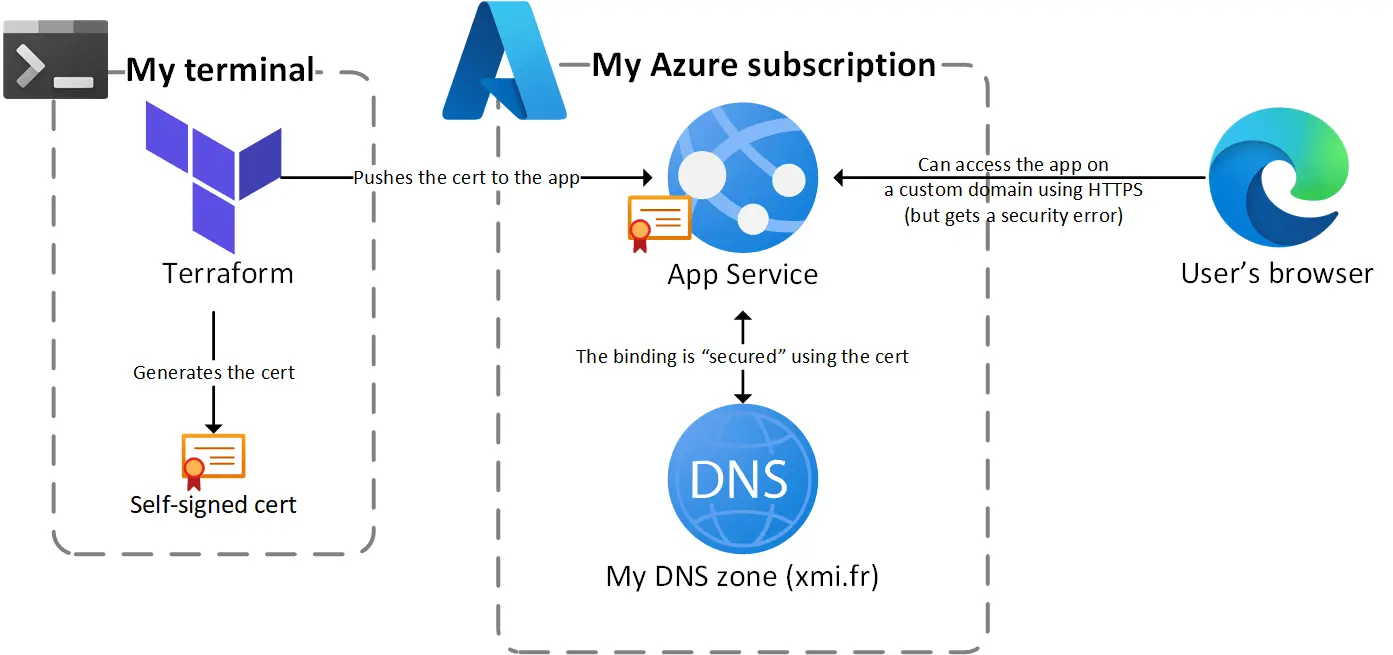
If we take a look back to our initial diagram, we have made the following changes:  Diagram of the generation and deployment of the self-signed cert
Stay tuned for the next post who will be about Let’s Encrypt. If you already need it, you can go to my repo as the code is already there 🤓
Thanks for reading !